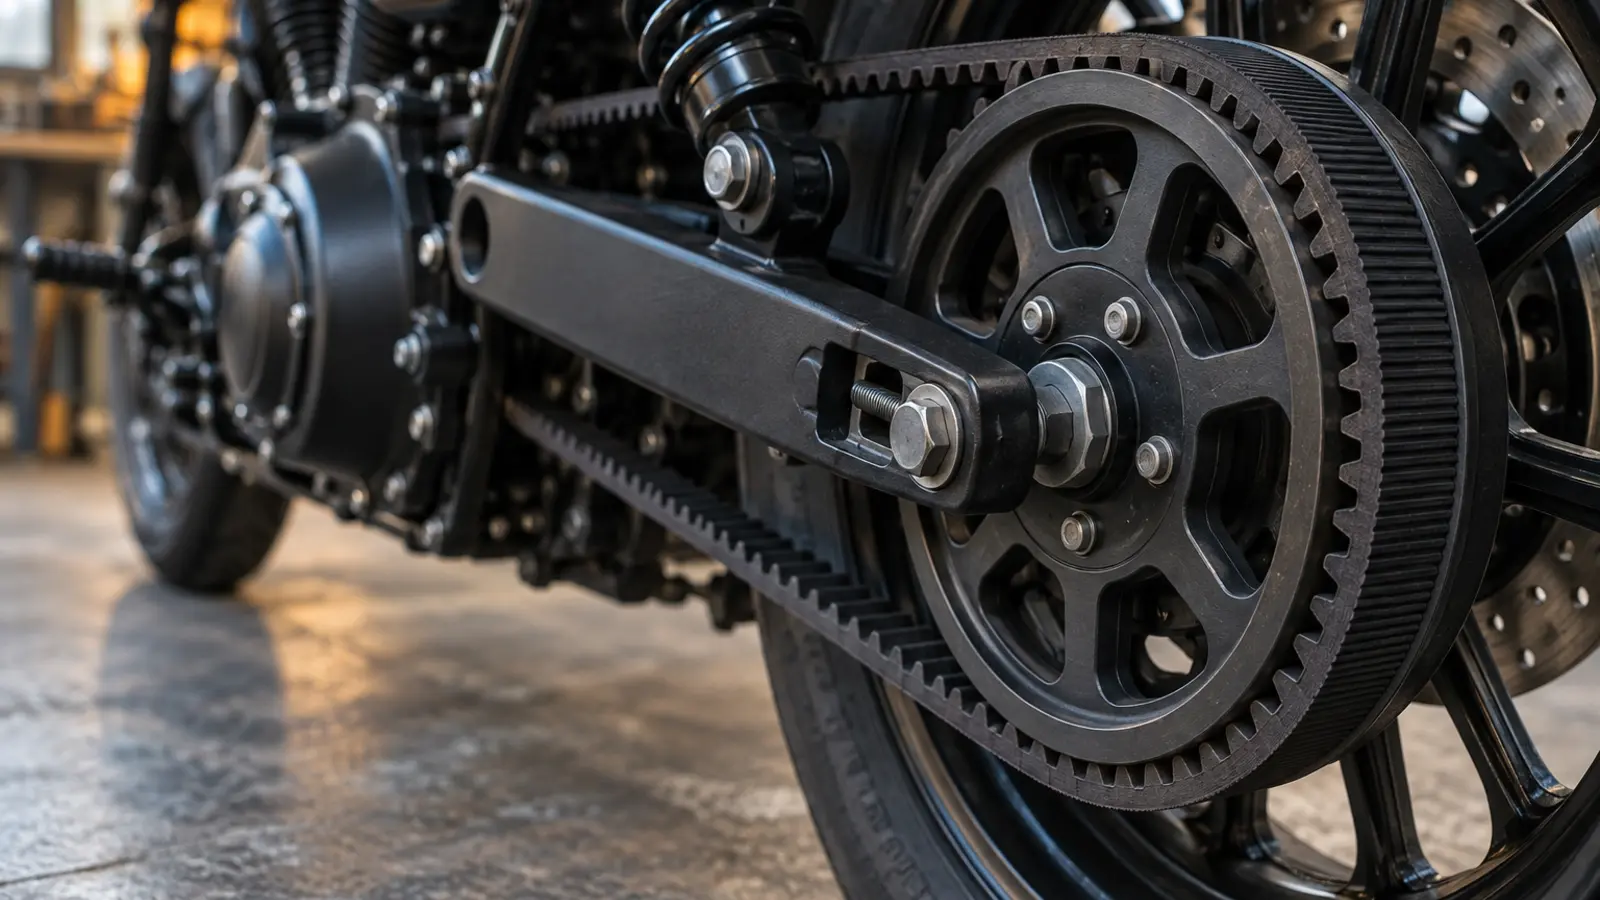
A belt final drive is the quiet one. It does not need oiling, it does not throw lubricant over the rear wheel, it does not stretch in the way a chain does and it can run for 40,000 to 100,000 miles before it needs replacing. Harley-Davidson has fitted belts since the 1980s, Indian, Yamaha's Bolt, Kawasaki's Vulcan 900 and a scattering of BMWs and Triumphs followed, and on all of them the owner's job is smaller than a chain would demand, but it is not nothing. A belt fails in different ways from a chain, it fails from neglect that is easy to miss, and when it does fail the repair is a big one. This guide covers the checks a rider should make, how to measure tension and alignment, how to clean a belt without damaging it, and what the damage that means replacement looks like.
- A drive belt needs no lubricant of any kind. Chain lube, oil, WD-40 and solvent all attack the belt's rubber and glaze the teeth. Clean it with water and a little mild detergent, nothing else.
- Tension is measured as the belt's deflection under a set force at a set point, cold, with the bike on its stand and the specified load on the suspension. The figure is in the owner's manual and differs by model; guessing by feel is the commonest cause of premature wear.
- Check the belt for stone damage, cracks at the base of the teeth, missing teeth, fraying edges and a shiny glazed face, and check both pulleys for hooked or chipped teeth. A single hole from a stone is a replacement, not a watch-and-see.
- Replacement costs in the UK typically run from £300 to £700 including labour, because on most belt-drive bikes the swingarm or the primary drive has to come off to fit the new belt.
How a belt drive works, and why it fails differently
The belt is a toothed loop of rubber or polyurethane reinforced with cords of carbon fibre, aramid or glass fibre, running between a small front pulley on the gearbox output and a large rear pulley on the wheel. The cords carry the load; the teeth transmit it. Because the cords do not stretch appreciably, a belt does not need the regular re-tensioning a chain does, and because the teeth engage positively there is no wear from links sliding over sprockets.
What kills a belt is damage to the cords or the teeth rather than gradual wear. A stone picked up between the belt and the rear pulley punches a hole and cuts cords. Running too tight overloads the cords and the wheel bearings and can snap the belt; running too loose lets the belt ratchet over the pulley teeth under hard acceleration and strips them. Misalignment wears one edge of the belt against the pulley flange until it frays. Oil and solvents soften the rubber. And age does the rest: a belt on a bike that has stood for years can look perfect and crack at the tooth roots on its first hard ride.
The inspection: every 5,000 miles and before a long trip
Most manufacturers ask for a belt check at the first service and then at every 5,000 miles or so; Harley-Davidson's schedules say 1,000 miles and then every 5,000. It takes fifteen minutes with the bike on its stand and a torch, and it is easier if the belt guard and debris deflector come off, which on most bikes is two or three bolts.
- Rotate the wheel and look at the whole belt. Turn the rear wheel by hand slowly and watch the belt's inner, toothed face pass. You are looking for holes and cuts from stones, cracks across the base of the teeth, teeth that are missing or rounded off, and the outer face for cracks and glazing.
- Look at the edges. A belt that is tracking against one pulley flange shows a fuzzy, frayed edge on that side and a polished band on the flange. That is an alignment problem first and a belt problem second.
- Look at the pulleys. Rear pulley teeth should have flat tops and symmetrical sides. Hooked teeth, chipped teeth and a bright wear band mean the pulley is finished and will chew through a new belt. Check the pulley bolts are tight and the pulley does not wobble.
- Check for contamination. Oil on the belt from a leaking gearbox output seal or a rear wheel bearing will soften it. Find the leak before you fit a new belt.
- Check the guards. The debris deflector is the belt's only protection from stones. If it is missing, cracked or bent, replace it before anything else.
Measuring tension properly
Belt tension is specified as deflection: how far the belt moves at the midpoint of its lower run when a set force is applied to it. The force is typically 10 lb (about 4.5 kg), the point is midway between the pulleys, and the specification is a range, often somewhere between 6 and 12 millimetres cold, but the actual figure, the load the bike must carry while you measure and whether it is measured on the side stand or with the suspension compressed all differ from model to model. Use the manual, not a forum. A belt tension gauge, which is a spring-loaded plunger with a scale, costs a few pounds and removes the guesswork; most Harley dealers will show you where to press and how far the belt should move.
Adjustment is at the rear axle: loosen the axle nut, turn the adjusters equally, re-check the deflection, then confirm the alignment before tightening to the specified torque. Always measure with the bike cold and the belt at its tightest point, because a belt's tension varies slightly around its length; rotate the wheel and measure in three or four places, then set the tightest spot to the specification. A belt that has reached the end of the adjusters has not stretched; something else is wrong, usually a worn pulley or an axle that has moved.
Alignment
The rear wheel must sit square to the front pulley or the belt will walk to one side and wear its edge. The marks on the swingarm adjusters are a starting point and are not always accurate from the factory. The reliable checks are a straight edge or a length of string along the rear tyre to the front, an alignment tool that hangs on the rear pulley, or simply watching where the belt runs: on a correctly aligned bike, ridden gently for a few miles, the belt sits centred or very slightly towards one flange without touching it. A belt riding hard against a flange after alignment has been set by the marks means the marks are wrong, and the adjusters should be set by the belt's behaviour instead.
Cleaning and the salt problem
Clean the belt with warm water and a small amount of mild detergent on a soft brush, then rinse and let it dry. That is the complete list. Do not use chain cleaner, degreaser, petrol, brake cleaner or any spray lubricant, and do not use a pressure washer at close range, which forces water past the pulley bearings. Belt dressing sprays sold for car fan belts are for V-belts and do nothing useful on a toothed motorcycle belt. In a British winter the concern is salt: it corrodes the pulleys and, more seriously, the wheel bearings and the axle adjusters, and a stiff adjuster is what makes riders skip alignment. Rinse the rear end after every salted ride and keep the adjuster threads greased.
When to replace, and what it costs
Any hole, cut, missing tooth or crack that reaches a cord means the belt is replaced now, not at the next service, because a belt that has lost cords can snap without further warning. Fraying on one edge that has not reached the cords can be stopped by correcting alignment, but the belt's life has been shortened. Age alone is a reason on a bike that has stood unused for several years. A belt in good condition on a well-aligned, well-tensioned bike will typically run 40,000 miles or more, and many pass 80,000.
The belt itself costs between £120 and £300 depending on the model. The labour is the expensive part: on most Harley-Davidsons and cruisers the belt runs inside the swingarm, so the swingarm has to be dropped and on many models the primary cover and clutch come off to pass the belt over the front pulley. Expect £200 to £400 in labour at a UK dealer or specialist, and replace the rear pulley at the same time if its teeth show any wear, since a worn pulley will strip a new belt within a few thousand miles.
The MOT and the belt
The motorcycle MOT includes the final drive. The tester checks that the drive belt or chain is not excessively worn or damaged, that its tension is not so slack as to be dangerous, that the pulleys or sprockets are secure and not badly worn and that a guard is fitted where one is required. A frayed, holed or over-slack belt is a failure, and a missing debris deflector can be a major defect on a bike where it forms part of the guard. A belt that has been inspected and tensioned by the owner every few thousand miles will never be the reason a bike fails.
Frequently asked questions
Should I lubricate a motorcycle drive belt?
No. Belts are designed to run dry, and any oil, chain lube or spray lubricant softens the rubber, attracts grit and glazes the teeth so they slip. Clean it with water and mild detergent only.
How tight should a motorcycle drive belt be?
As tight as the manual says and no tighter. Tension is specified as deflection under a set force at the midpoint of the lower run, measured cold, and the figure varies between models. A belt run too tight loads the wheel bearings and the cords; too loose and it can jump teeth under acceleration.
How long does a motorcycle drive belt last?
Forty thousand miles is a reasonable expectation on a bike that is aligned and tensioned correctly and kept free of stone damage; many belts exceed 80,000 miles. Life is set by damage and alignment, not by mileage alone.
Can a stone-damaged belt be repaired?
No. A hole or cut that has severed cords cannot be repaired and the belt should be replaced before the bike is ridden hard again. Fit or repair the debris deflector at the same time, because it is what let the stone in.
Is a belt drive better than a chain?
For a road bike ridden in all weathers a belt is cleaner, quieter and needs far less attention, and it lasts several times longer. A chain is cheaper to replace, tolerates gearing changes and stone damage better and is easier to fit at the roadside, which is why sports and off-road bikes still use it.